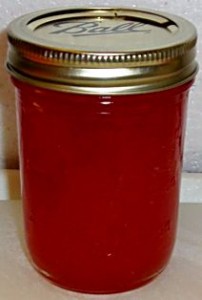
Watermelon jelly is a simple recipe that is easy to prepare and cook. It’s a beautiful jelly, makes an impressive gift for family or friends, and tastes as good as it looks. Making watermelon jelly is a good business to start at your own home and with a low capital investment.
Fully ripe watermelons that have a soft red flesh should be used for making jelly. The juice is extracted from the fruit and used to make a jelly, rather than a jam (jams contain pieces of fruit pulp whereas jellies are made from fruit juice). Watermelons contain little natural pectin so pectin has to be added to ensure the jelly will have a good set. Other fruits that are high in pectin, for example apple, rind of passion fruit, can be mixed with the watermelon juice if commercial pectin is not available.
Watermelon juice is not very acidic (pH above 5.0) which is too high to make a good jam or jelly. Jams give a gel when there is the correct ratio of pectin to water and the pH is between 2.5 and 3.45 pH. The optimum pH to give a good gel is pH 3.0. Therefore citric acid or lemon juice has to be added to the recipe to reduce the pH and increase the acidity of the juice. The yield of usable fruit from the whole fruit is approximately 43%.
How to make Watermelon Jelly

Equipments:
- Jar lifting tongs – helpful to pick up hot jars
- Lid lifter – to remove lids from the pot of hot water
- Lid – disposable – you may only use them once
- Ring – holds the lids on the jar until after the jars cool
- Canning jar funnel – to fill the jars
- 1 large pot
- Jelly strainer
- Large spoons and ladles
- Vegetable/ fruit peeler
- Bottle Jars
Ingredients:
- 4 cups chopped up watermelon (without the seeds or rind)
- 3 1/2 cups sugar
- 3 tablespoons lemon juice
- 1 package of dry no-sugar pectin
Procedure
- Select watermelons that are sweet and ripe, but nut overripe and mushy. Any color will work. You can mix different colors, if you like.
- Wash, cut and dice the watermelons. Then, Cut the watermelons open and start scooping out the contents. Ideally, you make small 1 inch balls, cubes or chunks. If you do this on a cutting board inside a baking tray, it will help you to collect the liquid to use. Remove remaining seeds. You will need 4 cups of chopped up watermelon.
- Place diced watermelon in a blender or food processor. Cover and blend or process until smooth. It should reduce to approximately 2 cups of watermelon puree. That (2 cups after the blender) is the amount you will need for the recipe.
- Pour it into a large pot and add the 3 tablespoons of lemon juice to the pot.
- In a small bowl, mix the dry pectin with about 1/4 cup of sugar. Keep this separate from the rest of the sugar. You can add about 20% more pectin (just open another pack and add a little) or else the jam is runnier than some people like. With a little practice, you’ll find out exactly how much pectin to get the thickness you like.
- Stir the pectin into the watermelon juice and put the mix in a big pot on the stove over medium to high heat (stir often enough to prevent burning). It should take about 5 to 10 minutes to get it to a full boil (the kind that can not be stirred away).
- When the berry-pectin mix has reached a full boil, add the rest of the sugar, and then bring it back to a boil and boil hard for 1 minute. Depending upon which type of jam you’re making (sugar, no-sugar, or fruit juice) you will need to use a different amount of sugar and type of pectin.
- Keep a metal tablespoon sitting in a glass of ice water, then take a half spoonful of the mix and let it cool to room temperature on the spoon. If it thickens up to the consistency you like, then you know the jam is ready. If not, mix in a little more pectin (about 1/4 to 1/2 of another package) and bring it to a boil again for 1 minute.
- Fill them into the jar to within ¼-inch of the top, wipe any spilled jam off the top, seat the lid and tighten the ring around them. Then put them into the boiling water canner or large pot. This is where the jar tongs and lid lifter come in really handy.
- Keep the jars covered with at least 2 inches of water. Keep the water boiling. In general, boil them for 10 minutes, especially if you use larger jars, or if you did not sterilize the jars and lids right before using them. Putting the jars in the boiling water bath REALLY helps to reduce spoilage.
- Lift the jars out of the water and let them cool without touching or bumping them in a draft-free place (usually takes overnight). You can then remove the rings if you like. Once the jars are cool, you can check that they are sealed verifying that the lid has been sucked down. Just press in the center, gently, with your finger. If it pops up and down (often making a popping sound), it is not sealed. If you put the jar in the refrigerator right away, you can still use it.
- Once cooled, they’re ready to store. They last up to 12 months. But after about 6 to 8 months, they get darker in color and start to get runny. They still are safe to eat, but the flavor and texture aren’t as good.
sources: pickyourown.org